

It sits on my hearth now, wearing a layer of rust and dust, three parts: two solid forms, 5 lbs. each, one upon the other, a team that’s served it’s mistress well and earned its rest. The two cast iron bases are shaped like plump, double-ender canoes. A clever metal handle grasps the top of a heated iron, and easily uncouples to take hold of the second base. A black, wooden dowel protects hand from the handle’s heat. This was the iron my grandmother used for most of her life; I remember seeing it heating on the cast iron stove when I was very small.
Like so much in Grandma’s kitchen, her iron fascinated me. With those heavy forms, she smoothed out the wrinkles in Grandpa’s freshly washed and starched, white shirts, set-in the pleats in her own voile and organdy bodices, ironed countless pinafores and shirts for four children, pressed the embroidered linen and lace table clothes and napkins used on Sundays. Dampen the garment; fold and roll it tightly; spread out the damp item on the padded board and begin pressing with one heated iron while the second iron heated on the stove. Fold, set aside, switch irons and begin again.
In Grandma’s immaculate kitchen, the table and pressed-wood-back chairs were the hub of family life on the farm. Usually, the table was covered with a cheery oil-cloth. In the center of the table, a white-enamel bowl sat, full of Saltine crackers for Grandpa. As he rushed out to the yard or sat down to read the paper, he’d always eat a few Saltines. And, if we grandchildren were very good, we’d get to take a few crackers from his dish for ourselves. Sometimes, Grandma sat out the butter dish and prepare buttered crackers for us. At that table we played Pick-Up-Sticks, Go-Fish, and Dominoes. Usually, we were three little cousins, two years apart, each seated on a few pillows or a dictionary. Grandma was fun, but she did not condone cheating, not even the slightest bumping of the table when that pesky Stick refused to slide off the pile for easy pick-up.
While we played, Grandma kept an eye on the pies or bread baking in the oven. Before she got the

fancy, gas, enameled stove on four slender legs, she had a fat, roaring, wood stove with two grand oven doors festooned with very practical, serpentine steel-wire handles that dissipated heat and helped reduce the chance of burning your hand opening the oven door. The stove top had these amazing holes with black lids. A long handle could be inserted to lift the lids – I suspect to drop in more coals, though I seem to remember the stove was fed coals at the front from a metal coal bucket sitting to the side. Grandma’s pots sat on top of the lids which glowed red with heat. And one of the four burners always held her red tea kettle with water hot for washing or making coffee or tea. There was a warming oven above the stove, though it was so far above my gaze, that I don’t remember much about it, except Grandma lifting down a bowl of beans or a pot roast that had been hiding there until dinner was served.
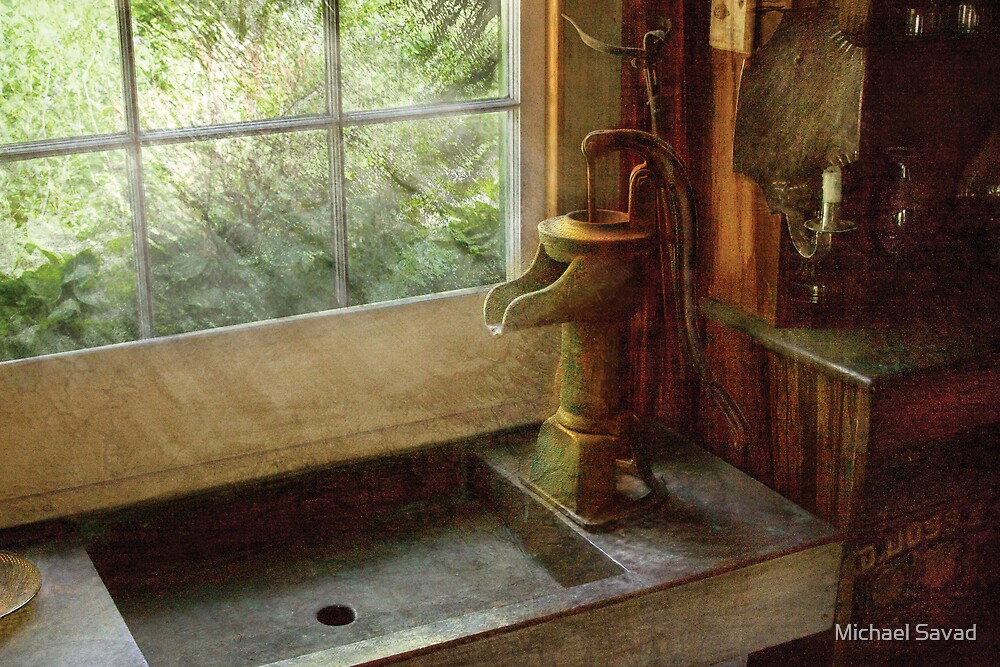
My favorite part of the kitchen were the pump and bucket that sat by the back door. The small pump sat in a wooden clapboard cupboard. The wooden bucket sat beneath the pump, and that bucket was kept full of fresh water with an enameled ladle hooked to the side. Being allowed to ladle out a drink of water was a great privilege for us cousins. A window above the pump looked out on the side porch and drive. Two windows across the kitchen faced out over the fields. Beneath those double windows were a kitchen counter and eventually a sink with running water. Grandma often stood at the sink, cleaning vegetables or washing up; she could look out over the fields of corn or wheat or potatoes, and she’d hold us up to look out as a pheasant or fox went ambling by.
All the windows were dressed in white curtains that were regularly washed, starched, ironed and rehung. There was linoleum on the floor, regularly scrubbed and waxed. A small pantry under the stairs next to the stove kept Grandma’s staples – flour, sugar, home-canned fruit and vegetables. With the items in her pantry, I believe Grandma could feed six people for a week without ever replenishing the larder. There was a lightbulb hanging from the angled ceiling of that little room, and I remember being amazed as fresh loaves of bread and jars of homemade jam were carried out by Grandma or her daughters and daughters-in-laws. Magic!
In my memory it was always summer in Grandma’s kitchen. Blowing curtains, the aroma of fresh-baked bread, and the squeak and gush of the pump splashing cold water into a wooden bucket.